As there wasn't an end-to-end guide on how to configure HTMLy that was complete with "how to configure the webserver", this felt like a good inaugural post.
HTMLy Apache Install Guide
DISCLAIMER
I've never actually set up a "real" web server before, so take the below with a grain of salt. Just because it works doesn't mean it was done correctly.
This guide will assume you are working with a generic Ubuntu 24.04 LTS server install. It will use port 80 on your machine as the default.
I tried setting this up on Alpine, but I couldn't get the required PHP modules installed. I also tried getting this set up on a Docker image, but couldn't find a good pre-built candidate.
This will not detail the domain name setup or port forwarding required, and may require additional configuration for external access.
I'm using Nginx Proxy Manager to manage my incoming connections from Cloudflare. If you're hosting this on Linode/DigitalOcean/some other VPS, you may have additional configurations needed per your service provider.
Requirements
- A clean Ubuntu 24.04 install
- An internet connection
What will be installed
- Apache2
- PHP + assorted modules
- HTMLy
Install Requirements
Starting off, run the following command with root permissions
sudo apt install -y apache2 php php-xml php-zip php-intl php-mbstring php-gd
You also need to enable the rewrite module for Apache, as HTMLy requires it.
sudo a2enmod rewrite
This installs apache (the webserver that will actually host the application) and the PHP dependencies needed by the application itself. The PHP dependencies were found on the HTMLy requirements page.
Installed this way, Apache will default to using /var/www/html for the displayed content. By default, this should be a generic index.html file.
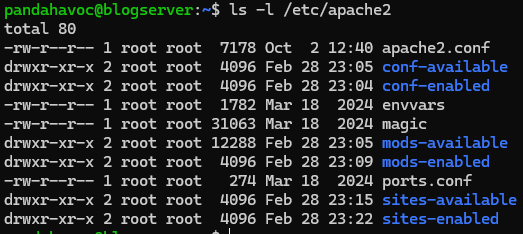
Apache config files are found at /etc/apache2/.
Next, verify all of the above is installed and accessible before proceeding.
Requirements Validation
Navigate to the local IP of the host server you're configuring. You should get a page with "It works!" text.
If you don't, you may have the Ubuntu firewall enabled. Read more about the uncomplicated firewall if you're unsure about what you're doing.
This command will allow traffic on port 80:
sudo ufw allow 80 comment "apache blogserver"
Run the following command to see enabled PHP modules (and confirm that PHP was installed)
php -m
You should see the zip, xml, mbstring, intl, and gd modules.
Web Server Setup
I created a new "blog" directory in /var/www/ to store the site files. This directory is the set as the root directory for the virtual host. Apache uses an enable/disable process for config files that will need to be performed, but all of this is relatively straightforward after some trial-and-error on my part.
Create required directories:
sudo mkdir /var/www/blog
sudo mkdir /var/log/blog
Transfer ownership to the apache user (www-data, in my case), so the setup can make the required changes:
sudo chown -R www-data:users /var/www/blog
Create new apache virtual host:
sudo touch /etc/apache2/sites-available/001-blog.conf
And add this text to it, replacing the localhost entries with your domain name or host server IP address.
  <virtualhost *:80>
      ServerName localhost
      ServerAlias localhost
      ServerAdmin admin@localhost
      DocumentRoot /var/www/blog/
      ErrorLog /var/log/blog/error
      CustomLog /var/log/blog/access common
      <Directory "/var/www/blog">
        Options FollowSymLinks Indexes
        AllowOverride All
        Order Allow,Deny
        Allow from all
        DirectoryIndex index.php
       </Directory>
    </VirtualHost>
Note: I initially configured mine with localhost/the host IP, performed the HTMLy setup outlined in the next step, then came back and updated this file with the correct blog.datahavoc.org entries after configuring Cloudflare DNS entries. I'm honestly not entirely sure what function the server name entries perform in this context, as webserver config is not my forte, so YMMV.
Run these apache commands to disable the default "It works!" page and enable your new config
sudo a2dissite 000-default.conf
sudo a2ensite 001-blog.conf
HTMLy Install
Pull the HTMLy installer to your home directory, then move it:
cd ~
wget https://github.com/danpros/htmly/releases/download/v3.0.4/online-installer.php
sudo mv online-installer.php /var/www/blog/
Visit http://{server_ip}/online-installer.php in your browser.
This should run the built-in HTMLy config, and perform all the setup needed to generate the blog site.
Cloudflare (optional?)
Direct your new blog.yourdomain.com entry as needed.
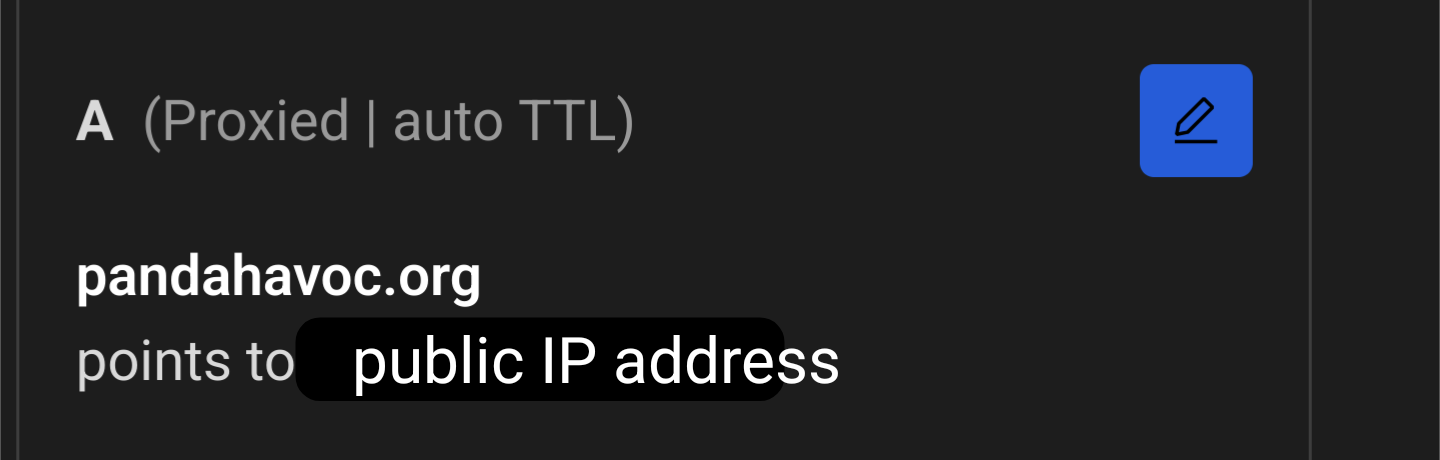
I have an A record pointed to my public IP address:
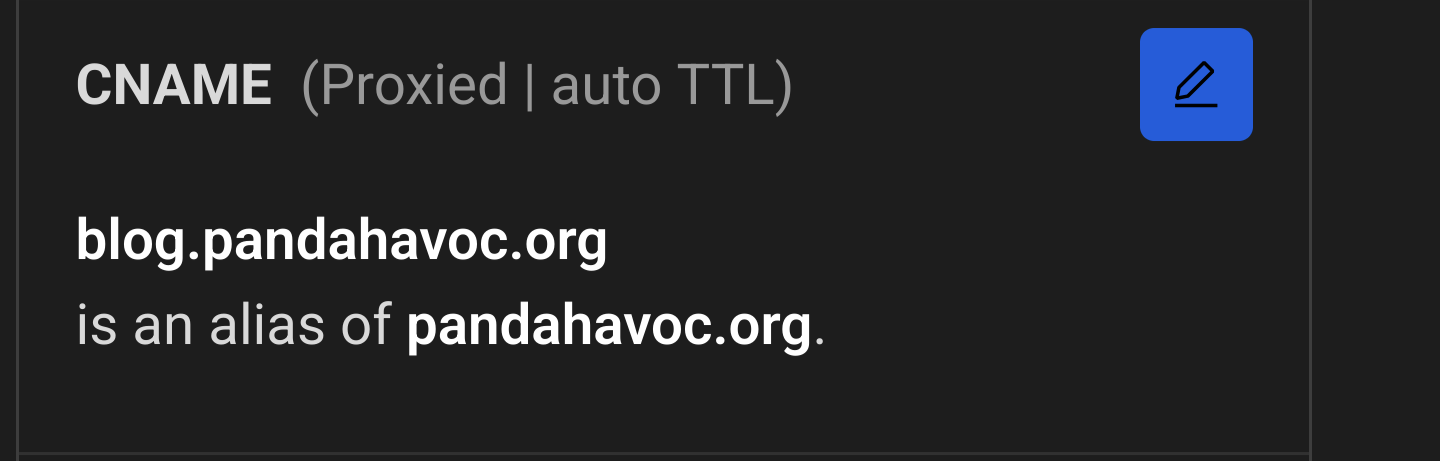
 And a CNAME record for "blog" that redirects to "pandahavoc.org":
Nginx Proxy Manager is set up to handle the incoming redirects from there, but if you are hosting this on Linode or DigitalOcean, you may not need this.